My followers

zondag 22 mei 2016

Arnhem Groupe Build Project Finished!

Not been very busy on blogger this week but I really wanted to get this project to an end. When I realised this week that there were only three weeks left for the event I pushed up the speed a little bit. Now I can say that it is finished and ready to be posted to the one who is making the whole diorama. I also wanted to finish something else but that is for later on this week.
Global picture off the finished vignette!

What did I do this week? First I did a little set-up to see how everything fits on the base. Then I drilled some holes in the base for placing the poles from the plates in with some wood glue. Next I added the mix of woodfiller with sand an brown paint over the whole base and I placed the checkpoint cabine. It had to dry for at least 24 hours so it would become very hard. Here is a picture off the result so far.


Next I painted the base completely with a dark brown from Revell. Then I drybrushed with GW Graveyard Earth, Revell Beige and GW Kommando Khaki. Then I placed some bushed made from Woodlands Scenic folliage, flowers from Greenline and Miniatuur and some grass from Games Workshop.

The tank was something tricky to place on the base. I had just enough place to get it on it. From the back off the tank to the front of the cannon is just 10 cm, the lenght of the base! At that moment I decide not to glue the turret so it can be moved a little bit to left or the right. Last step was adding the figures on the tank. They are all placed with wood glue so that it will invisible when it is dry.


Now it is time to reveal what is on the plates I placed. Maybe some of you remind that I wanted this tank to pass the border between Belgium (Lommel) and the Netherlands (Valkenswaard). Here you can see how I symbolised the border.

Flag of Belgium!

Flag of the Netherlands!

And because this is made for a very special event in Arnhem I added also a sign to let them know what direction they have to take.

Yes, that's the direction!

That's the story off this little piece of work. Here are some more pictures from other angles so that you get a good view off how it looks like. I hope you all like the final result.


So if you want to see this work and many others that members of Benno's Figures Forum have made for this project come to Arnhem on the 5th June. Here I give once more the information of this event.


FIGZ

Wargaming & miniatures event in the Netherlands

Sunday 5 June 2016, Arnhem (NL)


In the next days I will be active on blogger again. And later on this week I will post some figures I painted last week, and I have to blame someone for that. But as said that is for later on this week!


Welcome to my blog!!!!!


zondag 15 mei 2016

Jean Höfler Figures 3 and 4

Today two new figures of this range. They are really a joy to paint. No tricky details, big surfaces to paint so I can finish them quick! A reveal when you look at the little plastic friends. And it's good for my eyes, so they can get a rest.
 
The first figure is the outcome of a trade with my good friend Paul, better known as Beano Boy, from BB's Blog. He missed some of the poses, and still, just like me, and I could help him with some. So we agreed to help eachother to fill up the gap a little bit.
 
When I got this one I started to paint him directly because I liked the pose of this one very much. Also the way I wanted to paint him, I got directly in my mind. Black was the main color. I started to paint him with a very dark grey  and then drybrushed him with black I like the outcome together with the lighter colors!


The second one is one I had in stock. It looked nice to give the previous one someone to watch his back! And he looks real mean! So don't look for trouble with his friend!


I also made a picture of the four finished figures so far. They look colorfull all together. I hope you like them?


For the rest I'm busy with some basing of figures and a certain tank. Also some other figures are on the painting table. Unbelievable how much time I have for the hobby now I'm recovering! I get a lot of things finished. The recovering is going well by the way. Stopped medication for the pain this week, but I still have to be carefull with the moves I make. Sometimes I forget about that and then my leg let it know that I did something wrong! My own fault of course!


Welcome to my blog!!!!!


woensdag 11 mei 2016

Arnhem Groupe Build Project Part 4

With not more as four weeks to go to the event at Arnhem, it's about time I can finish my little part of the groupe build project. So I worked a bit harder and now I can say that the tank and the figures are finished.
 
 
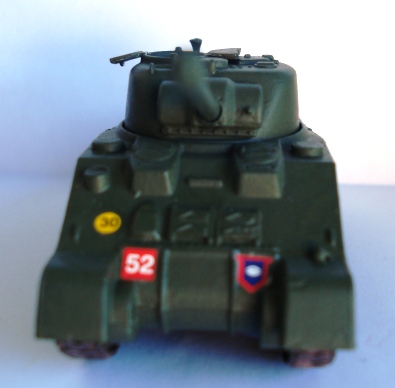
First the tank. In the next pictures you will see that I have put the tank together and placed the decals. I arranged the hatch of the turret by cutting in two. Tanktracks were painted with Revell Rust and GW Boltgun Metal and put in place before glueing the parts together.


In my younger years I would have been pleased with this result and would have started with another project. And as I'm still young..... I thank you for watching! See you next time!


Are you still there?


Well okay! I will go on. Next thing I did was adding a black wash mixed with more water. I didn't want to see to much black on the model. After that I brushed the model very heavy with Tamiya Weatherine Master Gray and Mud. Now it is finished and the result you can see here.


Now the tank looks used and not new from the factory. You might see that I didn't paint the little details on the tank, but I saw no need for that because I will placing the figures on that place.
 
 
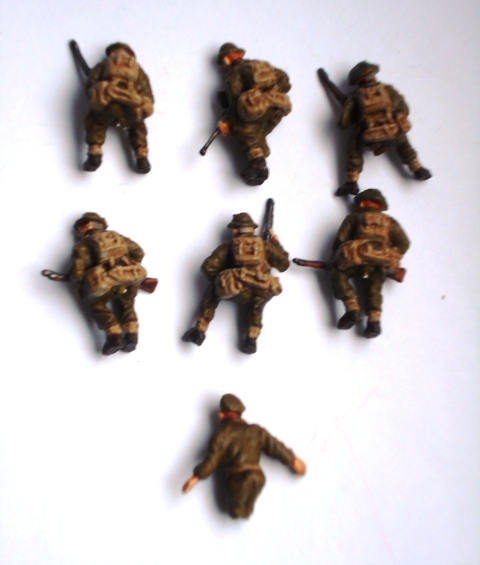
And that's where we arrive on the figures. I painted seven in total and they will all get a place on that tank. I have four figures left from the sprue (total of 11 figures) but I will not use them here. That means I will have to do another tank somewhere in the future.
 
I've painted the figures very simple. The main colors are Revell Olive Brown and Beige and finished with a GW Sepia Wash. Skin is painted with GW Elf Flesh and a GW Flesh Wash. The guns are painted with Revell Brown and GW Boltgun Metal finished with a GW Mud Wash! Shoes with Revell Dark Brown.


Now I must start working on the groundwork. I still have to paint the barrier and then I will place everything on the base to see if everything fits well on it. But that is for my next post on this project. The last one I hope. Keep watching!


Welcome to my blog!!!!!


donderdag 5 mei 2016

Esci Set 238 Muslim Warriors Part 1

I can't help it but during the Arnhem project I have to paint other things. I get bored when I have to paint the same things whole the time. Therefor I added a rule for myself. Not more as three things on the painttable. Only when something is finished I'm allowed to start something new. And these six figures are a result of this rule.


I wanted to keep these simple so I worked with not to many colors. I started with a white (Revell 5)undercoat and then I gave them a Vallejo Grey Wash. Then I gave them all a white drybrush. After that I painted all the skin parts with Tanned Flesh (GW), and a Flesh Wash (GW). For the red I used Blood Red (GW), for the guns Brown (Revell 85) and Boltgun Metal (GW) with a Mud Wash (GW). For the leather parts I used Snakebite Leather (GW) also with a Mud Wash (GW). Gold and Silver are also from Games Workshop. Black is from Revell (8).
 
They painted real quick and many more will follow. From this set there are nine more waiting for some paint (Esci 238 Muslim Warriors). After that some other sets will follow. Are in cue line:
 
They are also an addition to the earlier painted figures from this sets:
 
Here are the close ups of these painted figures.


I hope you like them!
 
Next time another update on the Arnhem Project. Keep watching!
 
Welcome to my blog!!!!!


maandag 2 mei 2016

Arnhem Groupe Build Project Part 3

The progress on this project goes slowly for me these days. But I managed to do something. Not much but it is progress. The tank is painted in bronze green (Revell 65), and the wheels with anthracite grey (Revell 9).
 
Here you can see the top half of the tank. All is painted by hand and needed three layers of paint to cover it good.


As you can see here the turret is still moveble, but at the end of the project it will be placed forward. You can also see that the turret is still open. More about that lower in this post.

 
Here the bottom part with all the wheels glued in place. I painted them before placing them. For some reason I can't paint these when the model is put together. But that is maybe the reason why I'm not a great model builder!


I wanted to glue top and bottom together but realised just in time that the tracks need to be placed befor doing that. It's almost imposseble to place them after putting both parts together.

 
Here is a picture of the hatch from the turret. This isn't finished yet. Needs another two layers of paint and then I will cut it in two parts so I can keep the turret open to place a figure in it. I will use another color for the inside of the turret. I'm thinking about olive green.

 
I will paint the tracks before placing them on the model with rust, gun metal and black to give them some weathering. But that is for the next update just like adding the decals and weathering of the whole tank. I hope to get this finished before the end of the week. In the mean time I will try to paint some more figures to. I would like to place at least five or six on the tank.
 
I hope that you like what you see so far!
 
I would like to thank everyone for the kind words on my previous post about the surgery! Thanks for the support! Every day it goes a little bit better.
 
 
Welcome to my blog!!!!!